Staining your deck is more than just a cosmetic upgrade; it’s a crucial step in preserving its durability and aesthetic appeal. Many homeowners overlook the importance of this maintenance task, only to face costly repairs or replacements later. Whether you’re dealing with a newly installed deck or an older one showing signs of wear, understanding when to stain is vital. Factors like weather exposure, foot traffic, and the type of wood used all influence how frequently your deck needs attention. The good news? With the right timing and approach, you can protect your deck from damage while enhancing its natural beauty.
So, when do you stain a deck? The answer depends on various factors, including the deck’s age, environmental conditions, and the quality of its previous finish. For instance, newly constructed decks often require staining shortly after installation to seal the wood and protect it from moisture. On the other hand, older decks may need refinishing every 2–3 years, depending on wear and tear. Staining isn’t just about aesthetics—it’s a protective measure that prevents rot, mold, and UV damage. By learning the signs that indicate your deck needs attention, you can extend its lifespan and maintain its visual appeal for years to come.
As you delve deeper into this guide, you’ll discover actionable tips, expert insights, and step-by-step instructions to ensure your deck remains in top condition. From understanding the ideal timing to selecting the best stain for your needs, we’ll cover everything you need to know. By the end of this article, you’ll feel confident in your ability to assess your deck’s condition, choose the right products, and execute the staining process like a pro. Let’s get started!
Read also:
Table of Contents
- Why Is Deck Staining Important for Your Outdoor Space?
- When Do You Stain a Deck for Optimal Results?
- How to Tell If Your Deck Needs Staining?
- What Are the Best Times of Year to Stain a Deck?
- Which Stain Type Is Right for Your Deck?
- How to Prepare Your Deck for Staining?
- Step-by-Step Guide to Staining a Deck
- What Are Common Mistakes to Avoid When Staining a Deck?
Why Is Deck Staining Important for Your Outdoor Space?
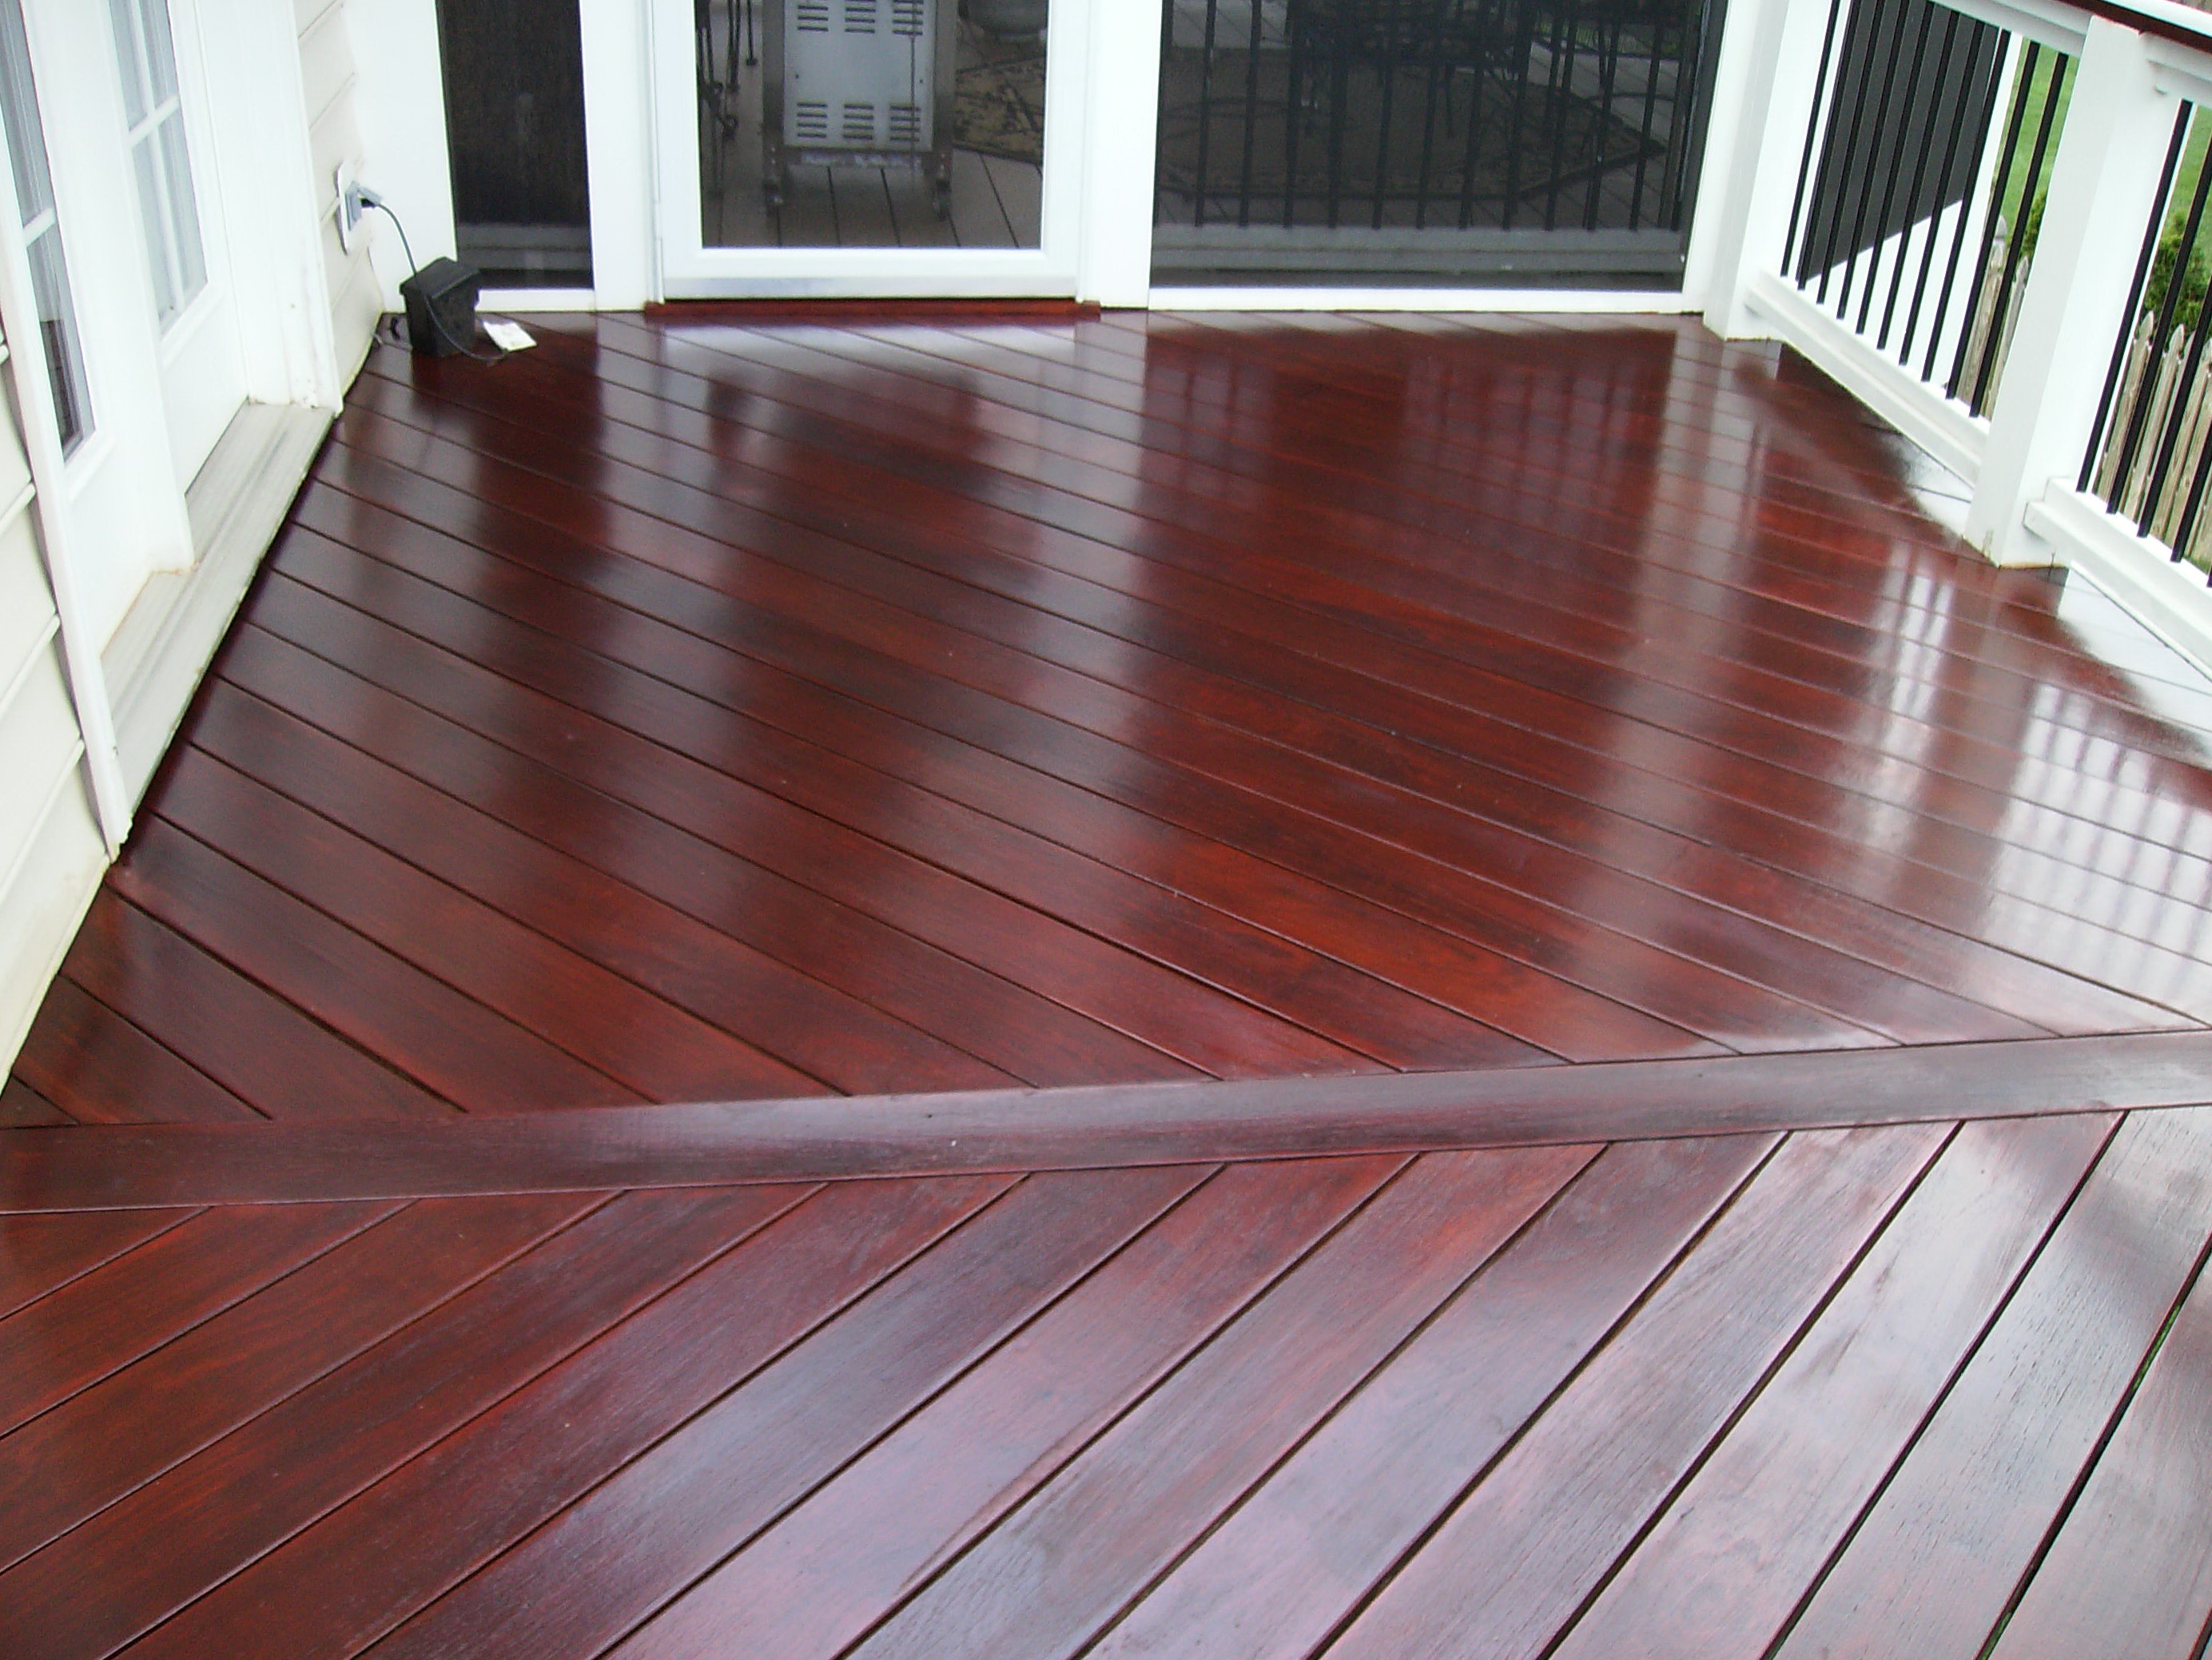
Deck staining is not just about improving the appearance of your outdoor area—it plays a critical role in protecting the wood from environmental damage. Wooden decks are constantly exposed to the elements, including rain, snow, sunlight, and fluctuating temperatures. Over time, these factors can cause the wood to deteriorate, leading to cracks, splinters, and even structural issues. Staining acts as a shield, sealing the wood and preventing moisture from seeping in, which is a primary cause of rot and decay.
Beyond protection, staining also enhances the natural beauty of the wood. Whether you prefer a rich, dark finish or a more natural look, stains come in a variety of colors and finishes to suit your style. This not only boosts curb appeal but also increases the value of your home. Homeowners who invest in regular deck maintenance, including staining, often find it easier to sell their homes at a higher price due to the well-maintained outdoor space.
Another reason staining is important is that it helps prevent mold, mildew, and algae growth. These issues not only make your deck look unsightly but can also pose health risks to your family and pets. By applying a high-quality stain, you create a barrier that inhibits the growth of these harmful organisms. Additionally, stains with UV protection can prevent the wood from fading or turning gray due to prolonged sun exposure. In short, staining your deck is an investment in both its longevity and your outdoor lifestyle.
When Do You Stain a Deck for Optimal Results?
Knowing when to stain your deck can make all the difference in its appearance and longevity. For newly installed decks, it’s recommended to apply the first coat of stain within 30 days of installation. This allows the wood to acclimate to its environment while still being fresh enough to absorb the stain effectively. Skipping this step can lead to premature wear and damage, as untreated wood is highly susceptible to moisture and UV exposure.
For older decks, the timing depends on the condition of the wood and the type of stain previously used. If your deck is showing signs of fading, discoloration, or water absorption, it’s time to reapply the stain. Generally, most decks require re-staining every 2–3 years. However, this can vary based on factors like climate, foot traffic, and the quality of the stain. For example, decks in humid or coastal areas may need more frequent attention due to higher moisture levels.
When do you stain a deck in terms of seasonal timing? The best time is during mild, dry weather, typically in spring or fall. Avoid staining during extreme temperatures, as this can affect the stain’s ability to adhere properly. Additionally, ensure the wood is completely dry before application. By timing your staining project correctly, you’ll achieve a smoother finish and longer-lasting results.
Read also:Discover The World Of 7starmovies Hd Your Gateway To Highquality Entertainment
How to Tell If Your Deck Needs Staining?
Recognizing the signs that your deck needs staining can save you from costly repairs down the line. One of the most obvious indicators is discoloration. If the wood appears faded, gray, or uneven in color, it’s a clear sign that the protective layer has worn off. Another telltale sign is water absorption. To test this, sprinkle a few drops of water on the deck’s surface. If the water beads up, the stain is still effective. However, if the water soaks into the wood, it’s time to reapply.
Cracks, splinters, and rough patches are also red flags. These issues not only compromise the deck’s safety but also indicate that the wood is no longer protected. Additionally, if you notice mold, mildew, or algae growth, it’s a sign that the stain’s protective barrier has failed. Addressing these problems promptly can prevent further damage and ensure your deck remains safe and attractive.
What Are the Visual Cues That Your Deck Needs Attention?
Beyond discoloration and water absorption, there are other visual cues to watch for. Peeling or flaking stain is a clear sign that the finish is no longer intact. Similarly, if the wood feels rough or splintered to the touch, it’s time for a refresh. Regular inspections can help you catch these issues early, making the staining process easier and more effective.
What Are the Best Times of Year to Stain a Deck?
Choosing the right time of year to stain your deck can significantly impact the results. Spring and fall are ideal seasons for this project, as the weather is typically mild and dry. During these months, the temperature is neither too hot nor too cold, allowing the stain to adhere properly and dry evenly. Avoid staining in the summer, as high temperatures can cause the stain to dry too quickly, leading to an uneven finish.
Another consideration is humidity. High humidity can prevent the stain from drying properly, while low humidity may cause it to dry too fast. Aim for days with moderate humidity levels and no rain in the forecast for at least 24–48 hours after application. This ensures the stain has enough time to cure without being washed away.
Why Is Weather an Important Factor When Staining?
Weather plays a crucial role in the staining process because it affects how the stain adheres to the wood. For instance, applying stain on a rainy or overly humid day can lead to streaks, bubbles, or an uneven finish. Similarly, staining in direct sunlight can cause the product to dry too quickly, resulting in a patchy appearance. By choosing the right weather conditions, you’ll achieve a professional-looking finish that lasts.
Which Stain Type Is Right for Your Deck?
Selecting the right type of stain is essential for achieving the desired results. Stains generally fall into three categories: transparent, semi-transparent, and solid. Transparent stains offer minimal pigmentation, allowing the natural grain of the wood to shine through. These are ideal for new decks or those with beautiful wood patterns you want to highlight. However, they provide less UV protection and may need to be reapplied more frequently.
Semi-transparent stains strike a balance between aesthetics and protection. They enhance the wood’s natural beauty while offering better UV resistance and durability. This makes them a popular choice for decks that receive moderate foot traffic and sun exposure. Solid stains, on the other hand, provide the most coverage and protection. They completely obscure the wood grain, making them suitable for older decks with significant wear and tear.
How Do You Choose Between Oil-Based and Water-Based Stains?
Another decision to make is whether to use oil-based or water-based stains. Oil-based stains penetrate deeply into the wood, offering superior protection and a longer-lasting finish. However, they take longer to dry and can emit strong odors. Water-based stains, on the other hand, are easier to clean up, dry faster, and are more eco-friendly. Your choice will depend on your priorities, such as ease of application versus durability.
How to Prepare Your Deck for Staining?
Proper preparation is key to achieving a flawless finish. Start by cleaning the deck thoroughly to remove dirt, grime, and old stain residue. A pressure washer can be effective, but be careful not to damage the wood. Alternatively, use a deck cleaner and scrub the surface with a stiff-bristled brush. Rinse the deck thoroughly and allow it to dry completely before proceeding.
Next, sand the deck to smooth out any rough spots or splinters. This not only improves the appearance but also helps the stain adhere better. Pay special attention to high-traffic areas and corners, as these tend to show more wear. Once the deck is clean and smooth, inspect it for any loose nails or screws and make necessary repairs. This ensures a safe and even surface for staining.
What Tools and Materials Do You Need for Deck Preparation?
To prepare your deck, you’ll need a few essential tools and materials. These include a pressure washer or deck cleaner, a scrub brush, sandpaper or a power sander, and a putty knife for filling gaps. Additionally, gather safety gear like gloves and goggles to protect yourself during the process. Having the right tools on hand will make the preparation phase smoother and more efficient.
Step-by-Step Guide to Staining a Deck
Staining your deck may seem daunting, but with the right approach, it’s a manageable DIY project. Start by stirring the stain thoroughly to ensure an even consistency. Using a paintbrush, roller, or sprayer, apply the stain in small sections, working with the grain of the wood. Be sure to apply an even coat, avoiding drips or puddles, which can lead to an uneven finish.
Allow the first coat to dry completely before deciding if a second coat is necessary. For most stains, one coat is sufficient, but heavily used decks may benefit from a second application. Once the staining is complete, allow the deck to cure for at least 24–48 hours before using it. This ensures the stain has enough time to set and provide maximum protection.
What Are Some Tips for Achieving a Professional-Looking Finish?
To achieve a professional finish, work in manageable sections and avoid overloading the wood with stain. Use long, even strokes and maintain a wet edge to prevent streaks. If using a sprayer, be sure to back-brush the stain into the wood for better absorption. Taking your time and following these tips will result in a beautiful, long-lasting finish.
What Are Common Mistakes to Avoid When Staining a Deck?
Even experienced DIYers can make mistakes when staining a deck. One common error is applying stain to wet or dirty wood, which prevents proper adhesion and leads to peeling. Another mistake is skipping the preparation phase, such as failing to clean or sand the deck beforehand. This can result in an uneven finish and reduced durability.
Using the wrong type of stain for your deck’s condition is another frequent issue. For example, applying a transparent stain to a heavily worn deck won’t provide adequate coverage or protection. Additionally, staining in unfavorable weather conditions, such as high humidity or direct sunlight, can compromise the results. By avoiding these mistakes, you’ll ensure a successful staining project.
Frequently Asked Questions
When